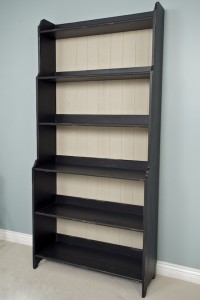
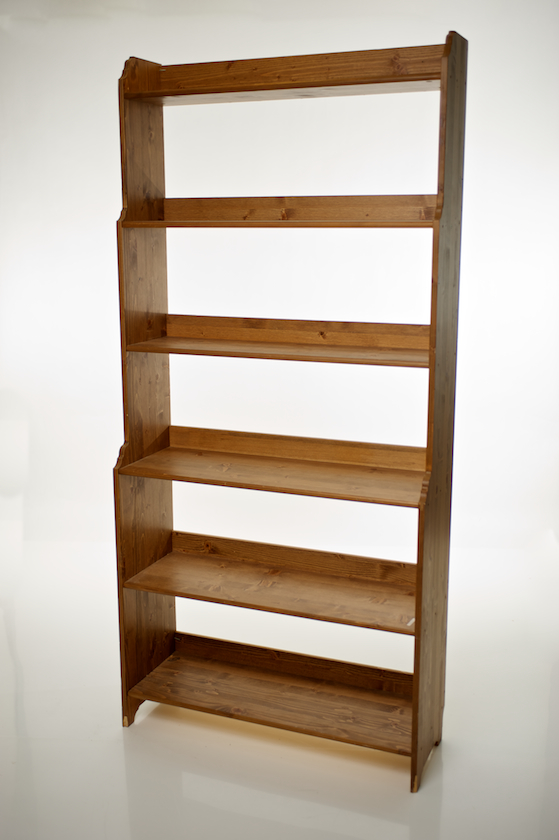
I acquired this Leksvik bookcase from my brother-in-law, he was about to take it to the thrift store. It’s really not that pretty in its natural state, actually kind of bland for my tastes. Obviously for him as well. With a little hard work I knew it could be good as new (well hopefully better than new) for someone else.
- I started by giving it an overall really well coating of primer that I tinted gray. I knew I wanted to “antique” the book shelf later, so the primer gave it a good base to give the final coat of paint a layered look just like a real authentic piece.
- After the primer was good and dry I added 3 coats of BEHR paint. (color: Stealth Jet, with a little extra pure black mixed in). This paint goes on really well and I highly recommend using it if you want a quality, well priced paint. I used Eggshell finish with this piece. For this kind of DIY I would use either a flat or low sheen, like eggshell.
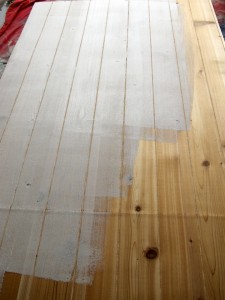
- We purchased some really well priced cedar paneling to go on the back. We got the piece for $7.00 because it had some minor flaws (you can see the ridge running across the panel, which was just lined up with one of the shelves so it doesn’t show). It normally sells for $100. Steal of a deal I say! It first had to be primed though.
- To measure the size of the panel I needed for the bookcase, I laid the unit flat down on it and traced around it so I would know where to cut. I cut the paneling board out with my circular saw.
- After the paneling was all cut, I gave it a good coating of Behr paint (colour: Castle Path). I rolled it on with a foam roller making sure I got into all the panelled edges and groves.
- I attached the paneling to the bookcase using PL Premium adhesive along the edges and at each shelf and a liberal amount of 1″ finishing nails from an air nailer. I have learned this from Mr.Homesy over the years, never waste an opportunity to strengthen a piece of furniture when you get the chance. The ultra strong PL Premium adhesive and nails with a large back panel like this will add a lot of strength and stability to the piece. If you consider how much weight in books this may hold and how a lot of this kind of furniture is assembled, it is a wise choice. This particular piece had a structural failure earlier in its life that could have been very bad if it had happened around a person (or child!!).
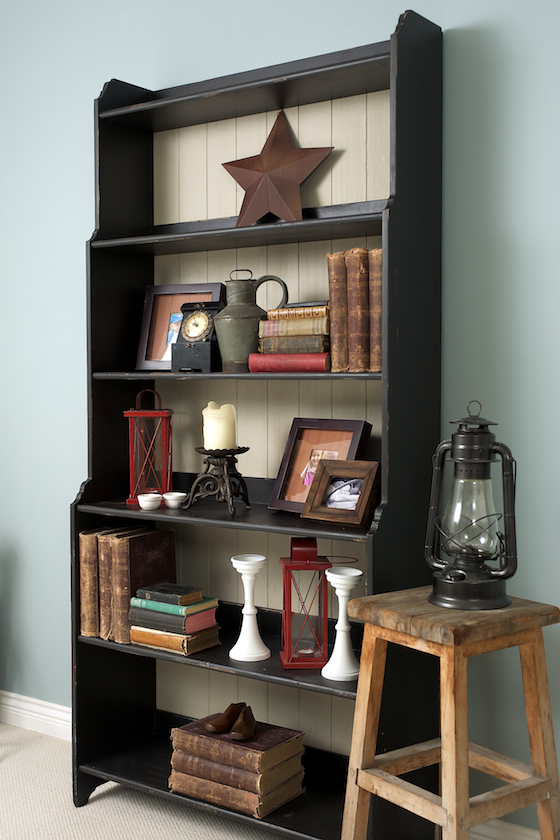
- After the panelling was attached to the bookcase, you really want to make sure a furniture piece is really dry before you attempt to “antique” it. If you don’t you will have a problem with the paint flaking or pealing off (latex paint peals off if not fully cured). Trust me, I’ve done it. I used some fine sand paper (600 grit) and ran it randomly over all the edges that would have likely be worn out if it was to be an older piece. I gave the bookshelf some additional wear marks by laying some nails on their side and hitting them with a hammer. When done strategically this can add some authentic wear and tear and gives the unit some charm.
 This is a simple piece that can be placed anywhere in your home. I have no use (or room) for this piece in my home, so I will likely sell it after the New Year when time is on my side. I did this project to show you that whether you use a Ikea product or another one of your own, with some paint and a few supplies great things can come out of it.
This isn’t the most glamorous piece, but someone out there will love to have in their home one day.
What Ikea furniture do you have lying around ready to paint?


The transformation is awesome! I am sure that the PL premium will not let it fall apart now, that stuff is great! Does all of the wonderful decor come with the item once it is for sale 😉
Just joking. I am so excited to see what else you have planned!! I am now inspired to paint something…
Yes, it is strong now. No, sorry the decor doesn’t come with it. Just for photos!
Thanks.
I have that same Leksvik shelf sitting sadly in my garage. You’ve inspired me!
Well there you go. A project for the New Year!! Glad I’ve inspired you!
Jacqueline, did you do the same with your bookcase? I’m looking for the same model to do a similar project but apparently, Ikea no longer carries this model. If you are willing to part with your Leksvik bookcase, email me at jeanniet888@gmail.com. Thx!
Where are you from Jeannie? I may be able to help you contact Jaqueline…
Apparently someone wants to buy your book case. You should hook up!
Looks fabulous! Love it!
Thanks! It’s nice to hear from you.
Funny, Helen re-did hers like that as well, except it is all white. I suggested the back panelling as that bookcase was quite wobbly before. You have styled it so well:)
Yeah, it was as affordable way to sell it. I sold it the next day for 150.00 on Craigslist. The unit was very strong.
I was looking for this bookcase on IKEA, and it looks like the name is now VALLVIK. FYI for anyone looking for the same bookcase.
Thanks for letting the people know this. It turned out to be a great project. I forgot to let the world of internet know that I sold the piece on craigslist the very next day! Thanks to the person that gave it to me!
Cool theme, my friend. Is this one unique or a free design? I am brand-new in this wholesome www blogging thing and want to begin my own blog with wp. I like your blog design and the contents you provide. Is there any such theme out there? I don’t want to copy or imitate your blog. Imitating is for chinese ;-). Regards from austria
Hi. The this is a purchased theme running on self-hosted WordPress. I purchased it from ThemeForest.net. There are literally thousands of templates there to choose from. I also wrote a post about our adventures getting this site setup, you can read it here.
Looks gorgeous Jodi! I’m loving all your projects and have saved several for upcoming posts.
Thanks Heather. I do appreciate all the kind comments from all my readers! I would love to be featured on your site!
A little late here, but I just found this and it is awesome! I have the buffet which matches in fine with my kitchen corner (my kitchen is so teensy weensy, it sort of bleeds out into the living room). I was considering getting the bookshelves to match so that my apartment doesn’t look like a lets-see-how-many-different-ikea-items-we-can-cram-in-one-room apartment. So…. since I am a Tucsonan and have a thing for Mexican design, what do you think about red?? Do you think following your same instructions, but replacing the black with red, would look equally as fabulous? I’d have to do the buffet, too, which could get tricky with the glass doors, but hey, we want results!!
Hmmmm….
Love the rest of your blog, too! (I have three, tee-hee-heeeee. Stop on by!)
grahamophone
I’m looking at buying this (or a similar bookcase) with plans to strip and stain it. Is it durable enough to withstand a full strip and stain? Also, is it actually solid wood? It seems to be pine, but the Ikea website doesn’t specify. Thanks in advance!
That specific series from Ikea is made of solid wool, so you could fully strip the finish and re-stain to your hearts content.
Thanks! I appreciate it!
I have this piece that needs to be worked on! We’ve had it for 9 years and my one concern with it has always been its’ sway. Having that panel on the back would take care of that issue. I was hoping to find another one in the spiced pine finish but now it’s not an issue, whichever one I can find can be made into a match!
Yes, adding the back will give it a sense of sturdiness. Good luck with the project!
Hi, I have that book case as well, so agree it is a wee boring….I painted mine an antique white with a grey paneling with intentions to sell it, kinda love it now, so not sure what I will do with it, may have to find a spot for it….thanks for the great ideas on changing something blah into something cool…………
Totally lost on this blog. I don’t see any pictures of this project.
Thanks for the heads up – a tiny issue with the server caused all the images to disappear. Resolved now.