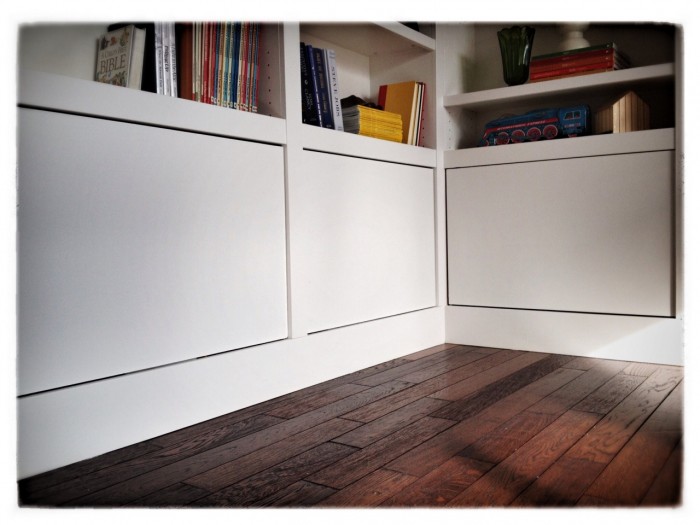
It’s been a busy few weeks here at our house and I am slowly getting to all the To do list done in my main living room area and our kitchen. All of you may be wondering what the heck I have been doing so today I thought I would share what we have been doing in our Living room and what work is outstanding to date.
When I tackle a larger project like this one, I create a work sheet for my records stating what needs to be done and in what order. One area can’t be worked on until the other area is done and so forth. If you have ever worked with trades before then you will know that it’s all availability and work flow is so important and timing is so very important! In this situation Darryl has been all my trades for the heavy-duty mill work, electrical, and construction and I have taken on the role of doing the fine details such as designing, painting, finishing work etc. Darryl and I work so well as a team building and designing and I tell you we love every moment of it! We don’t take this joy for granted at all.
So Here is the Work order that I had done up for the living room when we started this project. It will give you details of what has needed to be done and what has been completed so far to date.
Paint walls:
- Fill, sand and paint walls. – Completed.
Construction of the Fireplace:
- Remove existing mantle – Completed.
- Build out mantle to create a more substantial look. – Completed
- created a network of pipes (2.5″) to accommodate and move wiring for stereo equipment/ electrical equipment. –Completed.
- Clad fireplace with mill work. – Completed.
- Create a new mantle with larger crown molding and mill work. completed.
- Install a hidden box to accommodate speakers. – Completed.
- Install tile around fireplace/grout. – Completed.
- Paint out mantle in the “new trim work paint shade” – Completed.
- Hang Flat screen TV. – Completed.
Custom designed Crown molding:
- Have custom designed crown work installed. – Completed.
- Filled, sanded and painted. – Completed.
Windows and Door ways:
- Remove existing trim work. – Completed.
- Add larger trim to all windows.
Completed. - Fill nail holes, sand and paint. – Completed.
Custom Book Shelves:
- Create using 3 Billy book shelves from Ikea. – Completed.
- Create a raised box to set the bookcases on. – Completed.
- Paint the Billy book shelves. – Completed.
- Mount shelves to the wall. – Completed.
- Add Trim molding to the top of the bookcases. –Completed.
- add 1.5 inch trim and 3 inch trim to the front faces of the bookcase. – Completed.
- Install new baseboard (5.5″) around the base of the cabinet to allow them to flow into the rest of the base boards. –Completed.
- Enclose the bottom door openings with push tab openers. – Completed.
- Style bookcases. – Mostly Completed.
Credenzas:
- Install the Ikea “Besta” cabinets. – Completed.
- Drill appropriate sized holes for wiring, electrical, etc. – Completed.
- Install push openers. – Completed.
- Art work for above credenzas. – almost Completed.
;
Drapery:
- Source Fabrics: Completed.
- Drapery measurements to be sent into seamstress for custom drapes.- Work order is in. Turn around time is 10 days.
- Purchase Rod and clips.
- Hang rod and drapes when drapery is completed.
Windows and Door ways:
- Remove existing trim work. – Completed.
- Add larger trim to all windows and doorways. created was a network of pipes (2.5″) to accommodate and move wiring. –Completed.
- Fill nail holes, sand and paint. – Completed.
Other:
- Choose fabrics for pillows through a variety of sources. – Completed.
- Source New side tables. – Completed.
- Source New lamps.- Completed.
- Source new seating ( Traditional feel/ tufted) – Completed.
- Hang pendant in library area.
- Install new base boards around the whole perimeter of the room.
- Source a variety of styling aspects for the room. – Completed.
- Create art for above credenzas and send to the printers. work order in.
- Purchase new frames for art work. – Completed.
Yes, I know that’s a lot, but that’s your typical extreme re-design of a space. There are always a lot of details, but its in the details that I get so absorbed and utterly love what I do. Stay tuned, the reveal is coming I promise!!!
Thanks for sticking around for that long list!
till next time.
Jodi


Okay, I am really jealous that you have a handy husband!!!! Good for you guys, you have such a lovely home and to know that you did it all yourselves makes it that much better. Have a good week Jodi & Darryl.
You’ve got a lot done! I’m impressed with all you have completed. Wow!!! I’m with Tracey, the fact that you did it all yourselves makes it that much more gratifying. Way to go!!!